> ## Documentation Index
> Fetch the complete documentation index at: https://docs.getseam.ai/llms.txt
> Use this file to discover all available pages before exploring further.
# Installing web pixel
> Quickly set up the Seam's reveal tag on your marketing site.
## Finding Your Web Pixel Snippet
Before installing the web pixel, you'll need to retrieve your unique snippet from the Seam AI platform.
Navigate to **Settings → Seam Intent → Website**. Your personalized website tag snippet will be displayed here, ready to copy. This snippet is unique to your organization.
## Option 1: Google Tag Manager
To streamline script management — especially while that using several tracking tools — you can deploy the Seam AI website tag through Google Tag Manager (GTM).
Start by launching the GTM console. Go to **Tags**, then click **New** to create a new tag. In the **Tag Configuration** panel, choose **Custom HTML** as the tag type.
From your Seam AI settings, copy the website tag snippet provided. Paste this snippet into the **HTML** field in Google tag manager. Make sure to allow access to **All pages**. Once you’re done, click **Save** to finalize the setup.
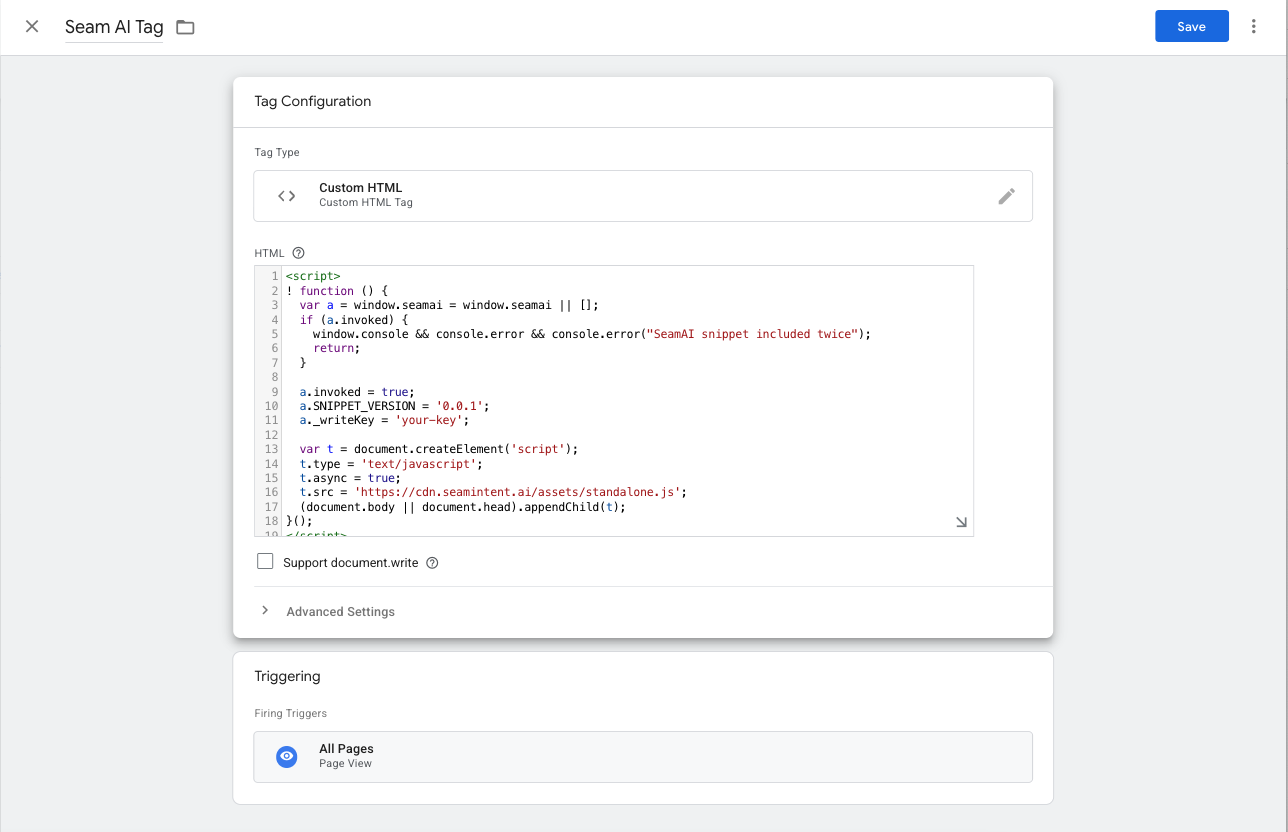 For additional guidance, refer to the official [Google Tag Manager support documentation](https://support.google.com/tagmanager/answer/6107167?hl=en).
## Option 2: Webflow
Webflow provides a built-in area for inserting custom code directly into your site.
To get started, go to your Webflow dashboard, open the **Settings** for your site, and click the **Custom Code** tab in the left-hand menu.
In the **Head Code** section, paste the Seam AI website tag from your Seam AI settings into the text area. If there’s already code in place, be sure to add the Seam script on a new line to keep things organized.
For additional guidance, refer to the official [Google Tag Manager support documentation](https://support.google.com/tagmanager/answer/6107167?hl=en).
## Option 2: Webflow
Webflow provides a built-in area for inserting custom code directly into your site.
To get started, go to your Webflow dashboard, open the **Settings** for your site, and click the **Custom Code** tab in the left-hand menu.
In the **Head Code** section, paste the Seam AI website tag from your Seam AI settings into the text area. If there’s already code in place, be sure to add the Seam script on a new line to keep things organized.
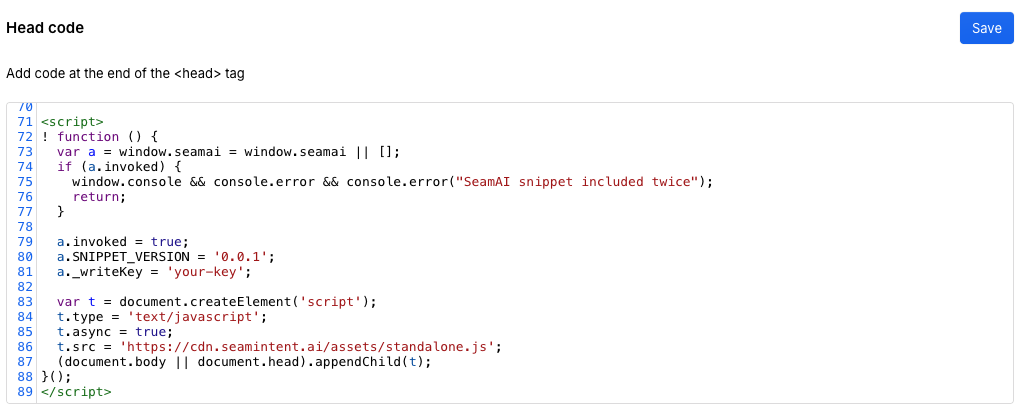 Once you’ve added the tag, click **Save**, then apply your changes by selecting **Publish → Publish to selected domains** in the upper-right corner.
## Option 3: Direct embed
You can directly embed the Seam AI intent script by adding a `
```
Once the tag is in place, no additional setup is required. The Seam AI website tag will immediately begin capturing visitor identification data automatically.
This documentation is built and hosted on [Mintlify](https://mintlify.com), a developer documentation platform.
Once you’ve added the tag, click **Save**, then apply your changes by selecting **Publish → Publish to selected domains** in the upper-right corner.
## Option 3: Direct embed
You can directly embed the Seam AI intent script by adding a `
```
Once the tag is in place, no additional setup is required. The Seam AI website tag will immediately begin capturing visitor identification data automatically.
This documentation is built and hosted on [Mintlify](https://mintlify.com), a developer documentation platform.